blog
Scan QR Code To Quick Access The Digital Orbis
Showing posts with label Tips & Tricks. Show all posts

[How To] Customize Right Click Menu Options in Windows

Have you ever been in a situation when you wanted to see an additional option on the right click to do whatever you want? Like you want to open Notepad just by right clicking and selecting Notepad option or Showing and Hiding files just by right clicking on it.  Then, here is a simple registry hack that will make you do it for you.

[How To] Customize Right Click Menu Options in Windows


I'll show you two demonstrations. In the first one, I'll show you How to add a new option in the Right Click Context Menu and in the second one, How to add new options in the Right Click Context Menu of files.

Let's start with the first one.

Demo 1: How to add a new option in the Right Click Context Menu


Step 1: Click on Start Menu and open Run application.

                                        OR

Just press Window + R keys to open Run application.

Run

Run


Step 2: Write "regedit" and press Enter.

Step 3: Expand HKEY_CLASSES_ROOT and browse down to the following key:

HKEY_CLASSES_ROOT\Directory\Background\shell

[How To] Customize Right Click Menu in Windows


Step 4: Right click on shell and click on New > Key.

[How To] Customize Right Click Menu in Windows


Step 5: Give the new key the name that you want to show up on the desktop context menu. In our example, we're using "Notepad".

[How To] Customize Right Click Menu in Windows


Step 6: Right click on Notepad and click on New > Key. Enter the key name "command" (without quotes and in small letters).

[How To] Customize Right Click Menu in Windows


Recommended Post: [How To] Add Apps to Startup in Windows 10

Step 7: There will be a (Default) key with type "REG_SZ". Double click on it and write Notepad.exe in the value data field as shown in the screenshot.

Think this "value data" as a command that will get executed in the Command Prompt. Writing Notepad.exe in the Command Prompt opens up Notepad, that's why we have written Notepad.exe in the "value data". 

Now, what if you want to open Paint program from the command prompt, what will you write? Paint.exe? Nooooooo. You will have to write there mspaint.exe because Paint program is defined as "mspaint.exe" program in windows/system32 folder and what if you want to open any third party program? Then, you have to put the full path of that executable file(.exe) in the "value data" field.

Click Ok.


[How To] Customize Right Click Menu in Windows

[How To] Customize Right Click Menu in Windows


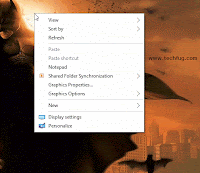
And we are done. Right click on the desktop or inside any directory, you'll see Notepad option there. Just click and it'll open Notepad for you.

Right click Notepad


And now we come to the second one.

Demo 2: How to add new options in the Right Click Context Menu of files


Step 1 and Step 2 are similar as above.


Step 3: Expand HKEY_CLASSES_ROOT and browse down to the following key:

HKEY_CLASSES_ROOT\*\shell


Step 4: Follow the same steps as above to add new options. In our case, we've added two new options Show and Hide. Create a new Key inside both of the options as "command" (same as we created on Demo 1).

[How To] Customize Right Click Menu in Windows

[How To] Customize Right Click Menu in Windows

[How To] Customize Right Click Menu in Windows


Step 5: There will be a (Default) key with type "REG_SZ". Double click on it and write attrib +h "%1" in the value data field.

As I said earlier, that we can write any command that we can execute in the Command Prompt. So, I have written attrib command here, that helps us to change attributes of a file or folder. In attrib +h "%1" command, +h option hides a file/folder and "%1" is the parameter that is bound to the name of the file right clicked, means the file on which it'll perform the action.
Now, click Ok button and we're done with "Hide" option.
Same thing can be done for "Show" option, we just have to replace the +h option with -h


Recommended Post: Top 12 Google Chrome Tips & Tricks


[How To] Customize Right Click Menu in Windows

[How To] Customize Right Click Menu in Windows

[How To] Customize Right Click Menu in Windows

[How To] Customize Right Click Menu in Windows

[How To] Customize Right Click Menu in Windows

[How To] Customize Right Click Menu in Windows

[How To] Customize Right Click Menu in Windows

[How To] Customize Right Click Menu in Windows


Now, test it by right clicking on any file it should work perfectly. Check the gif below to see the things working.

Hide Show GIF

Continue Reading...

[How To] Remotely Access Another Computer


Remotely Access Another Computer


Remote connection to another computer is the best way to transfer and receive the data between computers. Remote connections are commonly made using internet connection. By remote connections, we can easily control each and everything on another computer.

We can obtain all files even we can copy files from one computer to another computer remotely further we can shut down and can have admin entrance to that computer. With the good internet connection, it feels like we are really working on another computer. We can also chat with another PC user With Remote Computer Access. In this post, we will tell you the best methods to Remotely Access Another Computer.

How To Remotely Access Another Computer From Your Computer


Method 1: Remote Computer Access Using Google Chrome


Step 1. First Download the extension Chrome Remote Access in your Google Chrome.

chrome remote desktop


Step 2. Now this app will get added to your chrome and you can see it at right uppermost corner. Click on it and click continue.

chrome remote access extension


Now it will ask to allow access to data, proceed with allowing access to it.

chrome remote desktop allow access


Step 3. Now it will ask you to connect to another computer or share your computer. Now if you click on share this computer then it will generate a code.

Remote Computer Access Using Google Chrome


Step 4. Send the code to the partner by whom you want to accessed your computer. Note that other computer must have the same app installed on its computer. Now your partner will enter his code and your desktop will get the share to him exactly same as you can see yours.

Remote Computer Access Using Google Chrome


Step 5. By this anyone having access code can access your computer remotely and even you can
access someone else’s computer by having access code of it.

Method 2: Using Team Viewer


Team Viewer is very popular software to access any computer remotely.

Features Of Team Viewer:


  • Remote Computer Access
  • Text Chatting with partner
  • Video Calling
  • Remote File Transfer
  • Screenshot Capturing
  • Lock computer screen


Steps To Remote Computer Access Using Team Viewer.

Step 1. Download and install Team Viewer software in your computer. Your computer must be connected to the internet.

Step 2.  Now it will display User Id and Password. If you want your partner to access your computer then send him/her your user id and password.

Remote Computer Access Using Team Viewer


Step 3. If you want to access someone’s computer then get the User Id and password of Team Viewer of that computer. Now click on Connect To partner and type User Id of partner and then it will ask for the password. Fill in the password and press Enter.

Remote Computer Access Using Team Viewer


Step 4. Now it will start connecting your computer to another computer and finally, you can remotely access any computer. By this method, you can undoubtedly have remote access over another computer.

Method 3. Using Remote Desktop Connection


With Remote Desktop Connection, you can connect to a computer running Windows from another computer running Windows which is connected to the same network or to the Internet. For example, you can use all of your work computer’s programs, files, and network resources from your home computer, and it’s just like you’re sitting in front of your computer at work.

How To Use Remote Desktop Connection?

Step 1. You need to browse My Computer>Properties>Advance system settings.

Remote Computer Access Using Remote Desktop


Step 2. Now select the tab named “Remote” and then make sure to enable the option of “Allow connections only for computer running Remote Desktop with Network Level Authentication“.

Remote Computer Access Using Remote Desktop


Step 3. Now whenever your family members or you want to work on your computer from different locations you need to open Remote Desktop and have to enter the Name or IP Address of your own computer.

Remote Computer Access Using Remote Desktop


That’s it now you can easily access your computer from anywhere all you just need is to enable the inbuilt function of windows named Remote Desktop Connection.

Remote Computer Access Using Remote Desktop


So these are the methods to have Remote Computer Access. By connecting remotely, you can control your friend’s, employee and any of other’s computer and can even solve their problems by just sitting in front of your computer. You can also have Text Chatting and Video Calling by these methods. I hope you like this post.
Continue Reading...

[How To] Download Instagram Photos & Videos On Android Devices

Instagram is the fastest growing social platform that allows you to share your photos and videos. There might be some cases when you want to access a video when you are offline. So, here is the method to download Instagram photos and videos on your android device. Generally, Instagram allows you to only watch these videos and photos but does not permit you to download them. So, it creates a big problem if you want to download Instagram photos and videos. So, if you are searching for how to download Instagram videos and photos on android devices, then you are at the right place.

How to Download Instagram Photos And Videos On Android Devices


There are so many apps available for android to download Instagram photos and videos. However, the question arises that which one is the best application to download photos and videos? Here I’m going to share the top two apps to download Instagram photos and videos.

Using Instagetter


InstaGetter is a utility app, which helps to download images and videos from PUBLIC profile in a fast and easy way. Moreover, the offline videos can be viewed in a built-in player with looping mode. So, we have mentioned some simple steps which would help you in setting up Instagetter :

Step 1. First of all, download the Instagetter and install it your android device.

Instagetter - How to Download Instagram Photos And Videos On Android


Step 2. Now open your Instagram app and open the video/photo which you want to download. Now you have to copy the URL of the Instagram videos/photo which you want to download. For this click on right corner button as shown in below screenshot and the copy share URL.

Instagetter 2 - How to Download Instagram Photos And Videos On Android


Step 3. Now just open the Instagetter app and paste the copied URL into the app.

Instagetter - How to Download Instagram Photos And Videos On Android


Step 4. The app will check the URL and open the thumbnail of the valid video or photo.

Instagetter 4 - How to Download Instagram Photos And Videos On Android


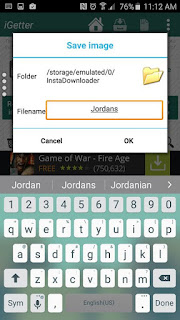
Step 5. Now tap on download to start download Instagram photos and videos on android.

Instagetter Save Photos


Also Read: Top 12 Google Chrome Tips & Tricks

Using InstaSave


InstaSave allows you to download Instagram photos to your device memory, allowing you to see them anytime, anywhere. Let’s know how to use Instasave.

Step 1. You need to download Instasave and sign in with your Instagram account. You need to find an image that you want to save.

Instasave - Select Images


Step 2. Now click on the save button which is located on the top right of the screen.

Instasave - Save Photos


That’s it you can now see your saved photos in your Gallery. This is the easiest method out there if you want to save any Instagram photos.

Also Read: [How To] do Reverse Google Image Search on Your Mobile Phone

There are some similar apps available in the play store to download Instagram photos and videos on your android, but Instagetter and InstaSave are best amongst all. Now you can download your desired photos and videos from Instagram by using these two apps. Hope you like the post. Share it with your friends too!
Continue Reading...

Top 12 Google Chrome Tips & Tricks

Hey friends! It's been a long time since my last post. But don't worry as good things come to those who wait! and I'm sure that this post is worth waiting because in this post I'm gonna share some good Google Chrome Tips & Tricks that you must know about.

Chrome is one of the most used web browser developed by tech giant Google. Since the release of Google Chrome on 2008 it has become so useful and handy for its users and developers as well. It comes with many useful and interesting features; extension is one of them. Extensions make it happen that a pure web browser can't. I have been using Chrome for several years and I love its UI and browsing speed.
There is a lot of things that people don't know about Chrome. These tips and tricks can enhance your browsing experience on Chrome.


Google Chrome Tips & Tricks

1. Fast Calculations

Very few people know that you can do fast calculations with Google Chrome browser. Chrome has the capability to do these fast calculations without leaving current tab. For instance, if I search "5 kg in grams", it shows instant result. Check screenshot below:


2. Prevent from Hanging

Hanging is a bigger issue for low configured computers. When you run multiple tabs and extensions at a time, they require your computer’s RAM and CPU to run. If your computer’s hardware configuration is low and you are opening multiple tabs, then it might hang.


Chrome has its own task manager which shows currently running processes in it. You can view the task manager by going Menu >> More Tools >> Task manager . Or, you can directly open it by pressing Shift + Esc  button. Here you can manage all processes and kill them by using the "End Process" button. If you browser is hanged, then you can easily close its tabs by opening your computer’s task manager. In task manager, it shows all different tasks of different processes which are easy to manage.


3. Store and Access Your Information Anywhere

Every day you use chrome to browse the Internet and many times you save your favorite pages as a bookmark. Chrome also saves your passwords, autofill, history and many more. If you want to access this information on another computer, then how you can do it?


You can easily synchronize your information like Apps, Extensions, Settings, Autofill, History, Themes, Bookmarks, Passwords and open tabs with your Google account. You just need to sign in on Chrome with your Google to synchronize all data. To manage the sync, go to Chrome Menu >> Settings >> Advanced sync settings


4. Use as a PDF Reader / Media Player

You don't need any third party software to read PDF files if you have Chrome installed on your computer as Chrome has inbuilt PDF reader in it. Chrome browser can be used as Media Player also. Chrome as a media player is not a better option to play media files but yeah you can use it any situation when you don't have any good media player installed on your PC e.g. In a cyber cafe. 
Just drag you media file on Chrome and it’ll play instantly. It supports many videos as well as audio files. You can also use it as an image viewer. This is one of my favorite Chrome Tips & Tricks.


5. Save Browsing Session

Suppose, you are searching on a specific topic for your project. You searched on Google and open many tabs for reading or taking notes. At a time, it is not possible to perform all tasks for your project. Therefore, you want to save all the current tabs as a bookmark for further reference. What will you do?


You just add one by one tab as a bookmark or you can save the current session on a single folder. To do so, click on Menu >> Bookmarks >> Bookmark open pages. Now give a name to the current session and click Save button to add all currently opened pages on a folder.
It’ll appear as a folder on the bookmark list. To open all pages at once, right-click on that folder and select “Open all bookmarks” option.

6. Enable Guest Browsing


Suppose, one of your friends borrow your laptop for browsing, then he or she could access all information you saved on the Chrome, like bookmarks, history, passwords, etc. These are your private and sensational data, that no one should know.


But, don’t worry about it. Chrome allows the users add multiple user accounts on it. In order to add a new account, click on Menu >> Settings, and on the “People” section, tick on “Enable Guest browsing” and click on “Add person” button to add a new account. In this way, you can prevent others to access your personal information.

7. Instant Dictionary and Translator


This one of the useful Google chrome tips and tricks I really like. While reading an article, many times we need the dictionary to find the meaning of different words. You can Google it for those word meanings or use a dictionary. But, they take time and distract you from reading.


In this case you can you two useful extensions; Google Dictionary and Instant Translate. If your native language is English, then use Google Translate. But, if you want to translate a word or phrase to your local language, the Instant Translate would better.

8. One Click History


This is a quick feature to see the last visited links on a tab. While you are browsing, if you want to check all those visited links on this particular tab quickly, then just click on the Back button for a while. It’ll show you only the links that have been visited on this tab. To see all the history, click on “Show Full History” option on it.

9. Speed up Chrome Browsing


Among all these Google chrome tips and tricks, this is the most searched query on the Internet. If your Internet connection is slow and you are not able to browse all pages, then this could solve your problem. There is an extension named Data Saver made by Google, which allows you to browse faster with chrome.
Install this tiny extension on your browser and enable it. It compresses all web elements to provide a faster web experience. This is the best feature for low bandwidth Internet users. You can do the same on your mobile to speed up Chrome browser for Android.

10. Chrome Remote Desktop


You can remotely access one computer from another even from an Android device with a great extension from Google called Chrome Remote Desktop. There are many third-party software available on the market to access a computer remotely, but you can’t use it on your mobile. This is very useful for both mobile and computer users.


You’ll need to install the extension from the Chrome Web Store onto any system you’ll be accessing, and also set up a security PIN.

11. Hidden Game on Chrome


Everyone knows about the T-Rex dinosaur that shows up when your computer is not connected to the Internet. The dinosaur image on the Chrome is not only an image; it’s a game and another best Google Chrome tips and tricks. You can play this game on both your computer and android devices.


When the chrome browser is offline on your computer, just press the Spacebar on the computer keyboard. It’ll start running. You can use the spacebar, up and down arrow to control the dinosaur. In case, of Android, switch to airplane mode and tap one the chrome window to begin the game. You need to tap on the screen to jump or fly the dinosaur.


12. Remote Debugging/Inspecting Websites/Devices


Inspect element is the Google Chrome's one of the best option. But, what if we want to inspect a website on Android mobile devices, then there is solution for you that is provided none other than Google. Google Chrome has option to inspect element the website on mobile. To inspect element websites on Android mobile devices follow the steps mentioned below:

Requirements
To begin remote debugging, you need:

  1. Chrome 32 or later installed on your development machine.
  2. A USB cable to connect your Android device.
  3. Android 4.0+ and Chrome for Android.


On your computer, the chrome://inspect page displays every connected device, along with its open tabs and debug-enabled WebViews. For step-by-step follow guide read Google's own article on Remote Debugging.


These were the Top 12 Google Chrome Tips & Tricks. Hope you'll like them. I'll keep this post updated when I'll get to know about some more interesting Google Chrome Tips & Tricks. Thank you! :)
Continue Reading...